Hi there...
thank you for purchasing RED:FOLIO,
a premium One Page / Multi Page WordPress Theme
In this document you will find detailed information on how to use this theme.
If you have any questions
If you don't find the answers to your questions in this help file, please send me a message via the item support tab. This theme includes 6 months support from purchase date, with options to extend.
I will do my best to assist with questions directly related to the theme set up however before you contact me, please consider finding an answer to your question in:
- The relevant section of the documentation
- the FAQ
- WordPress Codex for general WordPress questions
- Google for general questions
If you like RED:FOLIO and want to support my work please rate it on Themeforest!
Thank you!
Getting Started
1. Installing the theme
Please make sure that you are using the latest version of Wordpress before you install RED:FOLIO.
There are 2 ways to upload the theme:
Method 1: wordpress upload function
|
 |
Method 2: FTP upload
- Unpack the Theme's zip file you have downloaded
- Upload the /redfolio folder to the /wp-content/themes directory in your WordPress installation on your server
- Login to your WordPress admin
- Click Appearance >Themes
- Look for the RED:FOLIO theme and click Activate
2. Required plugins
Once you install RED:FOLIO, you will get a notification message in your WordPress admin telling you of the required and recommended plugins with an option to install them.
Alternatively you can go to Appearance > Install Plugins to see a list of the required plugins and to install them.

Once the plugins are installed, you need to activate them.

Required plugins
The following plugins are required to set up RED:FOLIO:- Meta Box - This plugin is required in order to display/use the custom fields for pages and custom post types.
- RedFolio Meta Boxes - This plugin is required in order to display/use the custom fields for pages and custom post types as well.
- RedFolio Custom Post Types - This plugin is required in order to display/use the 2 custom post types (Portfolio and Team). Once the plugin is installed you will see the custom post types in your WordPress admin. Once you've activated this plugin, save your permalinks by going to Settings > Permalinks and click Save Changes.
Recommended Plugins:
The following plugins are optional and you only need to install them if you want to use their features:- Simple Page Ordering - This plugin is recommended to sort the frontpage sections and portfolio items via drag and drop and display them in a certain order.
- Contact Form 7 - This plugin is recommended in order to display a contact form.
- RedFolio Shortcodes - Activate this plugin if you wish to use the RedFolio shortcodes on your site.
- RedFolio Share Buttons - Activate this plugin if you wish to display share buttons for each post and portfolio item. Select which share buttons do display in Appearance > Customize > Connect > Share.
- Custom Twitter Feeds - This plugin is recommended in order to display a twitter feed on the front page.
- WooCommerce - This plugin is recommended in order to include a shop page.
- FULLSCREEN SLIDER: Layer Slider
In order to install Layer Slider, go to Plugins > Add New, click Upload, find the layersliderwp-(versionNr).installable.zip file which is included in the RED:FOLIO download files (make sure you've downloaded 'All files & documentation' from Themeforest) and click Install now. Once the plugin is uploaded click Activate Plugin.

NOTE: If you get the Install Error: Are You Sure You Want To Do This? error message when installing the layerslider zip file via WordPress, it means you have an upload file size limit. Install the plugin via FTP if this happens, or get in touch with your hosting company and ask them to increase the limit.
Import theme demo data and settings (optional)
If you want a quick start you can import the content from the red:folio demo site (images are replaced with dummy images).
It is very important that you install and activate all required and recommended plugins before you install the demo content. You can do that in Appearance > Install Plugins..
How to install the demo content
- Click Tools > Import
- Click on WordPress
- Install the Importer by clicking Install Now and then Activate Plugin & Run Importer
- Upload the xml file called "redfolio-demo-content.xml", that you can find in the folder "demo content".
- Now assign your posts to an existing user, check the "Download and import file attachments" checkbox and click "Submit".
Recommended next steps
- Go to Settings > Reading and select Front page displays a "static page".Front page: "Home".Posts page: "Blog".
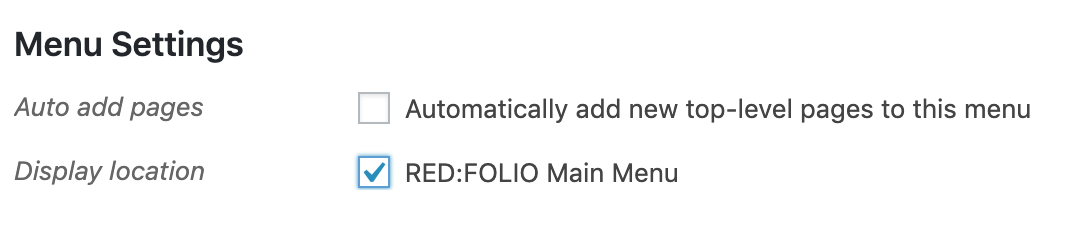
- DISPLAY MENU: Go to Appearance > Menus, select "my menu", scroll down and under Menu Settings > Theme locations, check RED:FOLIO Main Menu and click Save Menu.
- PORTFOLIO SECTION: In order for the portfolio section to display the portfolio categories, you will need to select the portfolio categories: Go to Pages > All Pages, look for the portfolio section and click "Edit", scroll all the way down and select the portfolio categories that you want to display in this section and click Update.
- SOCIAL SECTION: In order to display social icons in the social section, go to Theme Options > Social and enter the URL's to your social profiles.
- CONTACT FORM: If you've installed the "Contact Form 7" plugin before installing the demo content, you should find a contact form called "redfolio-form" in Contact > Contact Forms. Copy the shortcode add add it into Theme Options > Contact > Enter Contact Form 7 Shortcode .
- SECTION BUTTONS: You will need to enter the correct URL for the section buttons. Go To Pages > All Pages, and edit "home section", "portfolio section" and "blog section". Scroll down to SECTION BUTTONS and replace Button 1 URL with the correct URL (change "myurl" to your site's URL).
- CLIENT SECTION: In order to display client logos in the client section, go to Theme Options > Clients , click upload and select logos from the media library or upload your own.
Header / Footer
Setting up the Header
The Logo
- Go to Appearance > Customize > Site Identity .
- Click Select logo and upload your logo.
(It is recommended to upload your logo twice the width and height that you actually want to display it so it looks sharp on Retina screens. For example if you wish to display a logo with a height of 48px, upload a logo with a height of 96px.) - Below, enter your logo's height.
(For example if you uploaded a logo with a height of 96px, enter 48.)
The Menu

In order to create a new menu,
- Click Appearance > Menus.
- Enter a name for your menu and click Create Menu.
- In Menu Settings select Display location "RED:FOLIO Main Menu" and click Save Menu.
- Select menu items from the left column and click Add to Menu.
- Click on the drop down arrow of a menu item to change the navigation label or if you want to open the menu item in a new tab.
- Click "Sceen Options" in the top right corner for more options.


More detailed instructions on how to work with the WordPress menu can be found in the WordPress Codex
Setting up the Footer
The Social Icons Area
- In order for the social icons to appear in the footer, go to Appearance > Theme Options > Footer and check the Display social icons in footer checkbox.
- Enter the info for you social accounts in Appearance > Theme Options > Social.
- Click Save Options.
The Copyright Area
You can enter your own copyright text in Appearance > Theme Options > Footer > Copyright Text
Pages
Setting up the Front Page
- Click Pages > Add New.
- Look for Page Attributes on the right side and click on the Template drop-down menu. Select the "Front Page" template.
- Give this page a title, eg. "Front Page", you don't have to include any content. (The title and content will not appear anywhere on the site)
- Click Publish.
- Click Settings > Reading and select Front page displays a static page. Select the page you just created as your Front page and click Save Changes
- Now you can add sections to this page:
How to create a section on the Front Page
- For each section that you want to display on the front page, create a new page:
Click Pages > Add New. - You can give this section a title, eg. "home section" or "portfolio section". (The title will not appear anywhere on the site). You don't have to select a page template.
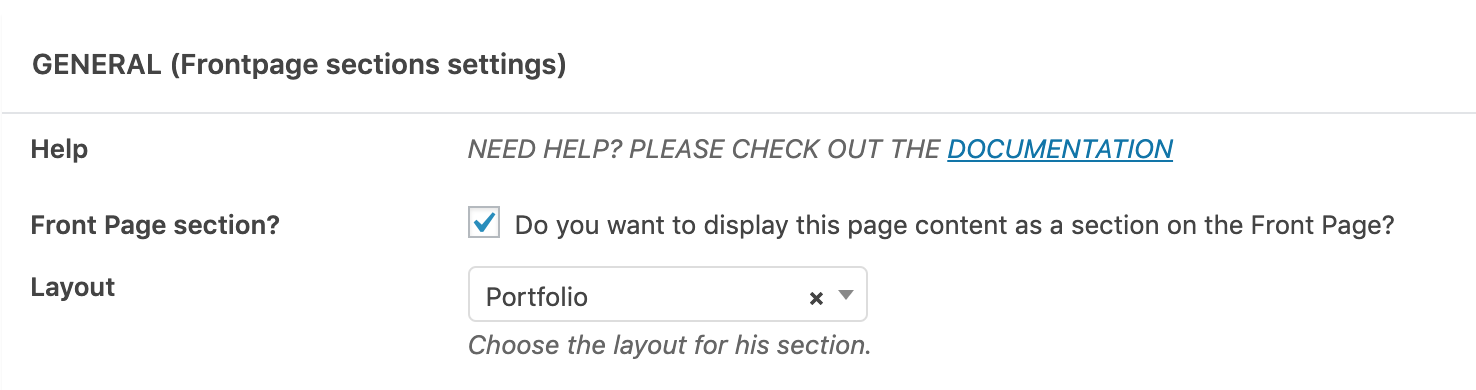
- Scroll down below the editor, and in the GENERAL box, check the Front Page section checkbox and select a layout
- Now you can optionally select a background color, add a background image with parallax effect (by uploading a Featured Image on the right hand side), enter title and subtitle and create section buttons.
How to add a section to the menu
- Go to Appearance > Menus , select a page from the left column and click "Add to Menu". If you want, you can rename the menu item by clicking on the drop down arrow of the new menu item and changing the navigation label.
How to change the order of sections
- Changing the order how sections appear on the front page requires the Simple Page Ordering plugin.
You can install this plugin in Plugins > Add New. Once the plugin is installed, you can simply drag and drop sections into order.
Home Image section - (fullscreen image and fade-in text)
- Click Pages > Add New.
- You can give this section a title, eg. "home section". (The title will not appear anywhere on the site). You don't have to select a page template.
- Scroll down below the editor, and in the GENERAL box, check the Front Page section checkbox and select Home Fullscreen Image
- In order to display a background image with parallax effect for this section, upload a Featured Image on the right hand side.
- Under Title and Subtitle > Title text enter a title. It will fade in first.
- Under Title and Subtitle > Subtitle text enter a subtitle. It will fade in second, along with any text that you put into the editor of this page.
- Under Section Buttons enter button text, URL and Color. It will fade in third. If you want to link a button to one of the sections on the front page
Enter the full URL of your website, followed by /#section-80. Replace 80 with the ID of the section you would like to link to.
This is how you find the section ID: Go to Pages > All Pages and hover over the page title of the section you want to link to

- Click Publish
Home Slider section
STEP 1: CREATE SLIDES
- First you need to install the Layerslider plugin. Click Getting Started > Required plugins in the menu above to find out how to install Layerslider.
- Once the plugin is installed and activated, go to LayerSlider WP > All Sliders and either import sample sliders or start creating your own. Find a demo for the sample sliders here. A documentation for Layerslider is included in the download files as well (layerslider/start_here.html)
- In order to display your slider fullwidth, select your slider and in Slider Settings set Slider width and Slider height to 100% and remove the "Max-width" value.
STEP 2: CREATE HOME SLIDER SECTION
- Click Pages > Add New.
- You can give this section a title, eg. "home slider section". (The title will not appear anywhere on the site). You don't have to select a page template.
- Scroll down below the editor, and in the GENERAL box, check the Front Page section checkbox and select Home Slider.
- Add the Layerslider shortcode into the editor.
- Click Publish
Video section
- Click Pages > Add New.
- You can give this section a title, eg. "video section". (The title will not appear anywhere on the site). You don't have to select a page template.
- Scroll down below the editor, and in the GENERAL box, check the Front Page section checkbox and select Video
- Enter the embed code for your video into the text editor.
If you are using Gutenberg, add the YouTube URL into the YouTube block. - Click Publish
Blog section
- Click Pages > Add New.
- You can give this section a title, eg. "blog section". (The title will not appear anywhere on the site). You don't have to select a page template.
- In the GENERAL box, check the Frontpage section checkbox and select the layout Blog .
- Under SECTION TITLE AND SUBTITLE optionally enter title (eg. "BLOG") and subtitle for this section
- In order to create a section button that links to the blog page, enter the blog pages's full URL into the Button URL field in the SECTION BUTTONS box. The blog page is the one you selected in Settings > Reading > Front Page displays A static page > Posts page.
- Click Publish
- Add blog posts via Posts > Add New
- You can set the number of blog posts to appear in this section in Theme Options > General > Theme Customization
-
How to add a READ MORE button to a blog post:
In order to display a "read more" button, you can use the "more tag". You can find the "more tag" button in the first row of the visual editor.
If you are using Gutenberg, use the "More" block.
If you don't want to split the content, simply put it at the end of the post.
Portfolio section
STEP 1: CREATE PORTFOLIO CATEGORIES
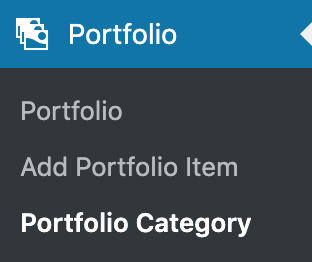
- Click Portfolio > Portfolio Category.
- Create new portfolio categories (for example: web, print, video,…) by filling in the name and slug and clicking Add New Portfolio Category.
STEP 2: CREATING PORTFOLIO ITEMS
- Click Portfolio > Add Portfolio Item
- Enter Title (will appear above portfolio item on hover), upload a Featured Image and fill in the Portfolio item settings and select a Portfolio Category.
- If you would like to display a video, simply enter the YouTube URL into the YouTube video field.
- Click Publish.
STEP 3: CREATE PORTFOLIO SECTION
- Click Pages > Add New.
- You can give this section a title, eg. "portfolio section". (The title will not appear anywhere on the site). You don't have to select a page template.
- In the GENERAL box, check the Frontpage section checkbox and select the layout Portfolio .
- Under SECTION TITLE AND SUBTITLE optionally enter title (eg. "PORTFOLIO") and subtitle for this section
- In order to create a section button that links to the portfolio page, enter the portfolio pages's full URL into the Button URL field in the SECTION BUTTONS box. If you haven't already created a porfolio page, add a new page and select the "portfolio" template.
- In the box PORTFOLIO settings, select the Portfolio categories you would like to display in this section.
- Click Publish
- In Theme Options > Portfolio you have the option to select the portfolio item gutter width, overlay color and opacity
SORT PORTFOLIO ITEMS
In order to sort the portfolio items, install the
Simple Page Ordering plugin.
You can do that in Appearance > Install Plugins.
Once the plugin is installed, you can simply drag and drop the portfolio items into a certain order. In order to display all portfolio items on 1 page, which helps to reorder them, in the top right corner click "Screen Options" and enter a number at least as high as the total number of items you've created.
Twitter section
STEP 1: CONNECT TO TWITTER
- The Twitter section requires the Custom Twitter Feeds plugin. You can install this plugin in Appearance > Install Plugins. Once the plugin is installed and activated, in the Admin Dashboard go to Twitter Feeds and follow the plugin's setup guide.
- Customize and style your twitter feed. The theme demo uses the following settings:
- 2. Customize
General: Width of Feed: 70%
Show: Author name, Tweet text, Date - 3. Style
Date > Date Text Size: 16px
Author > Author Text Size: 16px
Twett Text > Tweet Text Size: 36px
- 2. Customize
STEP 2: CREATE TWITTER SECTION
- Click Pages > Add New.
- You can give this section a title, eg. "twitter section". (The title will not appear anywhere on the site). You don't have to select a page template.
- In the GENERAL box, check the Frontpage section checkbox and select the layout Default .
- Select a background color or upload a Featured image in order to display it as a background image with parallax effect for this section.
- Into the editor, add:
[custom-twitter-feeds] - Click Publish.
Social section
- Click Pages > Add New.
- You can give this section a title, eg. "social section". (The title will not appear anywhere on the site). You don't have to select a page template.
- In the GENERAL box, check the Frontpage section checkbox and select the layout Social .
- Select a background color or upload a Featured image on the right hand side in order to display it as a background image with parallax effect for this section.
- Click Publish.
- Go to Theme Options > Social > Social Section and choose a color for the icons and enter the full URL to your social profiles.
Client section
- Click Pages > Add New.
- You can give this section a title, eg. "client section". (The title will not appear anywhere on the site). You don't have to select a page template.
- In the GENERAL box, check the Frontpage section checkbox and select the layout Clients.
- Under SECTION TITLE AND SUBTITLE optionally enter title (eg. "BRANDS AND CLIENTS") and subtitle for this section
- Click Publish.
- Go to Theme Options > Clients and upload your client's logos.
Team section
STEP 1: CREATE TEAM SECTION
- Click Pages > Add New.
- You can give this section a title, eg. "team section". (The title will not appear anywhere on the site). You don't have to select a page template.
- In the GENERAL box, check the Frontpage section checkbox and select the layout Team
- Under SECTION TITLE AND SUBTITLE optionally enter title (eg. "TEAM") and subtitle for this section
- Click Publish
STEP 2: CREATING TEAM MEMBERS
- Click Team > Add Team Member
- Upload a Featured Image and fill in the Team member info.
- Click Publish.
Shop section
This section requires the Woocommerce plugin. You can install this plugin in Appearance > Install Plugins.- Click Pages > Add New.
- You can give this section a title, eg. "shop section". (The title will not appear anywhere on the site). You don't have to select a page template.
- Into the text (not visual!) editor enter the following shortcode:
[recent_products per_page="4" columns="4"]
- In the GENERAL box, check the Frontpage section checkbox and select the layout default
- Under SECTION TITLE AND SUBTITLE optionally enter title (eg. "SHOP") and subtitle for this section
- In order to create a section button that links to the Shop page, enter the Shop pages's full URL into the Button URL field in the SECTION BUTTONS box.
- Click Publish
Contact section
- Click Pages > Add New.
- You can give this section a title, eg. "contact section". (The title will not appear anywhere on the site). You don't have to select a page template.
- If you enter text into the editor, it will display in the right column box.
- In the GENERAL box, check the Frontpage section checkbox and select the layout Contact
- (INFO: the demo version uses color #ffffff as background color for this section)
- Click Publish.
- Under SECTION TITLE AND SUBTITLE optionally enter title (eg. "CONTACT") and subtitle for this section
Adding a contact form to the contact section
- This requires the contact form 7 plugin and optionally the Really Simple Captcha plugin. You can install these plugins in Appearance > Install Plugins
- Once the plugin(s) is (are) installed and activated, go to Contact > Add New click the "Add New" button and set up your contact form:
Enter a title and create form fields.
Example from the theme demo:
[text* your-name watermark "Name*"]

[text* your-email watermark "Email*"]

[textarea your-message]

[captchac captcha-300 bg:#ffffff size:l] [captchar captcha-300]

[submit "Send"]
Here you can find more info on how to work with Contact Form 7: Contact Form 7 Docs. - Click Save and copy the shortcode. Now go to Theme Options > Contact and enter the shortcode in the field "Enter Contact Form 7 Shortcode" and click "Save Options".
Multi Page
Page Templates
The theme comes with the following custom page templates:
- Default Template - The default page (includes right sidebar)
- Fullwidth- A page without right sidebar
- Blog Masonry - Blog page with masonry layout
- Blog Masonry with sidebar- Blog page with masonry layout and right sidebar
- Blog 1 column with sidebar - Regular 1 column blog page and right sidebar
- Portfolio - A page that displays all portfolio items
- Team - A page that displays all Team members
- Contact - A page that is ready to display a contact form and google maps
- Front Page - A page that displays all Front Page sections
How to use a template:
- Click Pages > Add New.
- Look for Page Attributes on the right side and click on the "Template" drop-down menu.
- Choose a page template.
- Click the Publish button above.
- Now you can add your new page to your Menu.
Setting up the Front Page
- Click Pages > Add New.
- Look for Page Attributes on the right side and click on the Template drop-down menu. Select the "Front Page" template.
- Give this page a title, eg. "Home", you don't have to include any content. (The title and content will not appear anywhere on the site)
- Click Publish.
- Now you can add the new page to your Menu.
- Click Settings > Reading and select Front page displays a static page. Select the page you just created as your Front page and click Save Changes
- Now you can add front page sections to this page (click on One Page in the menu above, to find out how.).
Setting up the Blog Page
- Click Pages > Add New.
- Look for Page Attributes on the right side and click on the Template drop-down menu. Select the "Default Template".
- You can give this page a title, eg. "News". You don't have to include any content.
- Click Publish.
- Now you can add the new page to your menu .
- Click Settings > Reading and select Front page displays a static page. Select the page you just created as your Posts page and click Save Changes.
- Select the blog layout in Theme Options > General.
- Add blog posts via Posts > Add New
- You can set the number of blog posts to appear in this section in Settings > Reading
-
How to add a READ MORE button to a blog post:
In order to display a "read more" button, you can use the "more tag". You can find the "more tag" button in the first row of the visual editor.
If you don't want to split the content, simply put it at the end of the post.
Setting up the Portfolio Page
STEP 1: CREATE PORTFOLIO CATEGORIES
- Click Portfolio > Portfolio Category.
- Create new menu categories (for example: web, print, video,…) by filling in the name and slug and clicking Add new Portfolio Category.
STEP 2: CREATING PORTFOLIO ITEMS
- Click Portfolio > Add Portfolio Item
- Enter Title (will appear above portfolio item on hover), upload a Featured Image and fill in the Portfolio item settings and select a Portfolio Category.
- If you would like to display a video, simply enter the YouTube URL into the YouTube video field.
- Click Publish.
STEP 3: CREATE PORTFOLIO PAGE
- Click Pages > Add New.
- Look for Page Attributes on the right side and click on the Template drop-down menu. Select the "Portfolio" template.
- You can give this page a title, eg. "Portfolio". You don't have to include any content.
- In the box PORTFOLIO settings, select the Portfolio categories you would like to display on this page.
- Click Publish.
- Now you can add the new page to your menu.
- In Theme Options > Portfolio you have the option to select the portfolio item gutter width, overlay color and opacity
SORT PORTFOLIO ITEMS
In order to sort the portfolio items, install the
Simple Page Ordering plugin.
You can do that in Appearance > Install Plugins.
Once the plugin is installed, you can simply drag and drop the portfolio items into a certain order. In order to display all portfolio items on 1 page, which helps to reorder them, in the top right corner click "Screen Options" and enter a number at least as high as the total number of items you've created.
Setting up the Team Page
STEP 1: CREATE TEAM PAGE
- Click Pages > Add New.
- Look for Page Attributes on the right side and click on the Template drop-down menu. Select the "Team" template.
- You can give this page a title, eg. "Team". You don't have to include any content.
- Click Publish.
- Now you can add the new page to your menu.
STEP 2: CREATING TEAM MEMBERS
- Click Team > Add Team Member
- Upload a Featured Image and fill in the Team member info.
- Click Publish.
Setting up the Shop (WooCommerce) Page
- The shop pages require the Woocommerce plugin.
You can install this plugin in Appearance > Install Plugins. - Immediately after activating the plugin, you are taken to the setup wizard.
You can use the wizard, or skip it and manually set up everything. - Now create your products
- You can display a sidebar on the shop pages by going to Appearance > Widgets and adding widgets to the "Woocommerce" sidebar.
- If you would like to add a shopping cart icon to the menu in the top bar, install the Woocommerce Menu Bar Cart plugin.
- Detailed information and videos on how to work with WooCommerce can be found here:
Dokumentation
WooCommerce Guided Tour Videos
Setting up the Contact Page
- Click Pages > Add New.
- Look for Page Attributes on the right side and click on the Template drop-down menu. Select the "Contact" template.
- You can give this page a title, eg. "Contact".
- If you enter text into the editor, it will display in the right column box.
- Click Publish.
Adding a contact form to the contact page
- This requires the contact form 7 plugin . You can install the plugin in Appearance > Install Plugins
- Once the plugin is installed and activated, go to Contact > Add New click the "Add New" button and set up your contact form:
Enter a title and create form fields.
Example from the theme demo:
[text* your-name watermark "Name*"]

[text* your-email watermark "Email*"]

[textarea your-message]

[submit "Send"]
Here you can find more info on how to work with Contact Form 7: Contact Form 7 Docs. - Click Save and copy the shortcode. Now go to Theme Options > Contact and enter the shortcode in the field "Enter Contact Form 7 Shortcode" and click "Save Options".
Theme Features
The Customizer
The Customizer can be found under Appearance > Customize.
All changes that you make in the Customizer may be previewed before saving them.
The following options can be found in the Customizer:
- Logo
- Site Icon
- Share Buttons (requires the RedFolio Share Buttons plugin)
The Theme Options Panel
The Theme Options can be found under Appearance > Theme Options.
The following options can be found in the Theme Options Panel:
- General
- Header
- Layout
- Typography
- Color
- Social
- Clients
- Contact
- Footer
Sidebars
RED:FOLIO includes 2 sidebars.
You can find them in Appearance > Widgets.
- Right Sidebar
The right Sidebar displays on single blog pages, pages with "default template ", "regular blog page" and "blog masonry with sidebar". - Sidebar WooCommerce
The Sidebar WooCommerce displays on the right side of your shop pages.
SHORTCODES
Using shortcodes is very easy. To use one, create a new post (or edit an existing one), and in the the editor type a shortcode in brackets. You can find a demonstration and the code for all included shortcodes on the Shortcodes page of the theme demo.
Highlight
Highlight 1 uses black text, hightlight 2 white text. If you don't add a color value for the background color, the secondary theme color as set in the Theme Options Panel will be used.
                        [highlight1 color="#a3d7df"] highlighted text [/highlight1]
                        [highlight2 color="#a3d7df"] highlighted text [/highlight2]
Round Image
Simply upload your image via the Add Media button and wrap it with the Round Image shortcode. Uploaded image needs to be square (e.g. 300 x 300px)
[round_image]Image Goes Here[/round_image]
Button
Button which uses the secondary theme color as set in the Theme Options Panel:
[button link="http://www.fullURL.com"]Click me![/button]
Button which uses the secondary theme color as set in the Theme Options Panel and opens in a new tab:
[button target="_blank" link="http://www.fullURL.com"]Click me![/button]
Button with custom color and which opens in a new tab:
[button target="_blank" color="#a3d7df"" link="http://www.fullURL.com"]Click me![/button]
Tabs
[redsun_tabs][redsun_tab title="Tab 1"] Tab 1 content [/redsun_tab][redsun_tab title="Tab 2"] Tab 2 content [/redsun_tab][redsun_tab title="Tab 3"] Tab 3 content [/redsun_tab][/redsun_tabs]
Toggle
                        [toggle title="Toggle title"]
                        Hidden content
                        [/toggle]
Dropcaps
[dropcap] First Letter [/dropcap]
Pullquotes
                        [pullquote_left] Quote text [/pullquote_left]
                        [pullquote_right] Quote text [/pullquote_right]
Divider
[divider]
Column Shortcodes
Please find a demonstration and the code for the column shortcodes on the Shortcodes page of the theme demo.Icons
RED:FOLIO includes the "Fontawesome" icon font.
This is how you add an icon to your posts and pages:
- Choose your icon from here: Fontawesome
- Add the code as follows (replace "fa-heart" with whatever icon you would like to use):
<i class="fa fa-heart"></i>
Example increase icon size x 5, and use light grey color:<i class="fa fa-heart fa-5x" style="color: #aaa;"></i>
More examples here.
FILE INFO
Changelog
Version 3.08 - Released: October 08 2021- Fixed: Social icons in footer
- Fixed: Home image content alignment
- Fixed: Responsive Typography
- Fixed: Masonry Blog Layout
- New Demo Data
- file: theme-functions.php, scripts.js, layout-responsive.css - Fixed: Mobile Navigation
- file: template-team.php, single-team.php, team-section.php - Fixed: Allow HTML in Team About field
- folder: layerslider and all files within - Added: Newest version of Layerslider.
- file: functions.php in child theme - Fixed: typo
- folder: layerslider and all files within - Added: Newest version of Layerslider.
- file: template-frontpage.php - Fixed: disable parallax effect on mobile devices
- file: options.php, scripts.js, page-title.php, all page template files - Added: option to set page title size in Them Options Panel
- file: style.css, layout-responsive.css - Fixed: twitter feed in Safari and on mobile devices
- file: template-frontpage - Fixed: allow HTML in frontpage titles and subtitles
- file: options.php, clients-section.php - Added: more client logo upload fields
- file: template-portfolio.php, portfolio-section.php - Fixed: data validation
- file: header.php, theme_functions.php - Fixed: no hardcoding of custom body_class()
- file: scripts.js, prettyphoto.js, jquery.selectbox.js, jquery.parallax.js, jquery.waypoints.js - Fixed: replaced jQuery .click(), .hover(), .delegate and .bind() with .on()
- file: template-frontpage.php - Fixed: WP_Query instead of query_posts li> file: client-section.php, logo.php, social-section.php - Fixed: data validation
- Fixed: change textdomain to theme slug
IMPORTANT!
Version 3.0 is a major update to make the theme compatible with the latest WordPress Requirements for Envato Market, to make the theme safe and update the code to the latest coding standards.
Most every file had to be changed in the process.
Please BACKUP your site before updating!
In order to ensure full functionality after the update, follow the steps below:
Before the update
- Backup
Backup your site. You can use a Backup plugin for that. - Google Analytics
The Google Analytics field was removed from the Theme Options Panel. Please use a Google Analytics plugin instead
After the update
- Clear cache
If your site doesn't display properly, please clear your browser cache. - Save Theme Options
Go to Appearance > Theme Options and save your Theme Options by clicking the Save Options button in the bottom right corner. - Required / Recommended Plugins
Install and activate the required (and recommended) plugins in Apperance > Install Plugins. You can find a list of all required and recommended plugins and an explanation in this documentation under Gettings Started > 2. Required Plugins. - Save Permalinks
If any of your pages doesn't display properly and you see a 400 error page instead, save your permalinks by going to Settings > Permalinks and clicking Save Changes. - Rebuild your Thumbnails
Some image sizes were changed to make the images look sharp on retina screens, so they need to be rebuilt. You can use the AJAX Thumbnail Rebuild plugin for that. Once the plugin is installed and activated, go to Tools > Rebuild Thumbnails, select all thumbnails and click Rebuild All Thumbnails. - Twitter Feed
The Twitter Section now requires the Custom Twitter Feeds plugin. Please follow the instructions in One Page > TWITTER section. - Logo
The Logo uploader in the Theme Options Panel has been moved to the Deprecated section and will be removed eventually. Please upload your logo in Appearance > Customize > Site Identity instead. - Favicon
The Favicon upload field can now be found in Appearance > Customize > Site Icon.
Below the main changes are listed:
Fixed:
- Data validation
- Twitter section (now requires the "Custom Twitter Fedd" plugin)
- Better code for videos in portfolio section
Improved:
- Clean up all the code
- Improved code/design for Theme Options Panel
Added:
- Child theme
Moved:
- Custom Post Types
- Meta Boxes
- Shortcodes
- Share Buttons
Version 2.06 - Released: 06/12/2017
- file: header.php, functions.php - Fixed: several code improvements
- file: style.css, dynamic-css.php - Fixed: color in dropdown menu
- file: scripts.js - Fixed: Allow fullscreen for videos in lightbox.
- file: template-portfolio.php - Fixed: if portfolio category on portfolio page is selected, only images from that category are shown in lightbox
- file: clients-section.php, options.php - Added: a few more client logo fields
- file: functions.php, options.php - Added: load WooCommerce stylesheets if WooCommerce plugin is installed. No need to check checkbox in Theme Options Panel any more.
- file: woocommerce.css, woocommerce_functions.php - Added: Support for WooCommerce 3.0.0
- folder: layerslider and all files within - Added: Newest version of Layerslider.
- folder: metaboxes and all files within - Added: Newest version of the meta box script.
- folder: metaboxes and all files within - Added: Version 4.6 of the meta box script.
- file: scripts.js - Fixed: Smooth scroll on front page, which stopped working in WP 4.5
- file: twitter-section.php, tgm-activation.php - Fixed: Twitter section (now requires the Kebo Twitter Feed Plugin)
- file: single-portfolio.php - Fixed: display right button color
- file: header.php, functions.php - Added: Theme Support for Title Tag
- folder: layerslider and all files within - Added: Newest version of Layerslider.
- file: layout-responsive.php - Fixed: Home image on iPhone (white space on the right)
- file: style.css - Fixed: Video icon size
- folder: layerslider and all files within - Added: Newest version of Layerslider.
- folder: fontawesome and all files within - Added: Newest version of Font Awesome icon font.
- file: portfolio-section.php, template-portfolio.php, blog-section.php - Fixed: missing translation ready text.
- file: options.php, social-section.php - Added: new icons to social section / footer: Houzz, Amazon, 500px, Tripadvisor
- file: jquery.prettyphoto.js - Fixed: prettyPhoto XSS fix.
- file: template-frontpage.php, scripts.js, dynamic-css.php, options.php - Added: Option to remove border around home image.
- folder: layerslider and all files within - Added: Newest version of layerslider.
- file: portfolio-section.php, template-portfolio.php, blog-section.php, loop.php, template-blog-style1.php, template-blog-style2.php, template-blog-style3.php - Added: all text translation ready.
- file: class-tgm-plugin-activation.php - Fixed: XSS vulnerability fix.
- file: woocommerce.php, product-searchform.php, functions.php, options.php / folder: woocommere and all files within - Added: WooCommerce plugin support
- file: search.php - Added: Search also in portfolio subtitle field.
- file: twitter-section.php, jquery.twitterpostfetcher.js, functions.php, options.php - Fixed: Twitter section.
- file: scripts.js, functions.php, style.css, layout-responsive.css, portfolio-section.php, template-portfolio.php, team-section.php, blog-section.php, template-blog-style1.php, template-blog-style2.php, template-blog-style3.php, template-frontpage.php, jquery.lazyload.min.js - Fixed: page speed improvements, lazy load images.
- file: scripts.js, template-frontpage.php - Fixed: multiple portfolio sections sorting.
- file: functions.php - Fixed: thumbnail size for video.
- file: template-frontpage.php, options.php, scripts.js - Added: Option to set minimum home title and section title font size for mobile devices.
- file: functions.php - Added: Improvement of child theme support
- file: style.css, layour-responsive.css - Fixed: slider layout.
- file: mobile_detect.php - Fixed: isMobile returns true on desktop after Chrome's update.
- file: options.php, config-meta-boxes.php, portfolio-section.php, template-portfolio.php, search.php - Added: option to link portfolio item to any URL
- file: template-fontpage.php, config-meta-boxes.php, style.css - Added: Video section
- file: scripts.js - Fixed: if portfolio category is selected, only images from that category are shown in lightbox
- file: prettyphoto.css, loader.gif - Added: loading icon when lightbox opens
- file: options.php, dynamic-css.php - Added: option to center client logos
- file: options.php, client-section.php - Added: option to hyperlink
- file: scripts.js, style.css - Fixed: load home image faster. lient logos
- file: archive.php - Fixed: archive template layout issue
- file: options.php, social-section.php - Added: social icons Vimeo, Vine, Soundcloud
- file: portfolio-section.php, template-portfolio.php - Added: Vimeo support
- file: portfolio-section.php, template-portfolio.php, prettyphoto.css, scripts.js - Added: Show title and previous & next arrows in portfolio lightbox
- file: functions.php, header.php - Fixed: mobile menu
- Initial release.
Theme Files
CSS
The following CSS files are included in the theme:
Style.css (located in: main directory)
Contains: Foundation for the site design. It controls the design structure of the theme. Be careful modifying this file so that you don't break the layout. I recommend making a copy before you edit this file.
If you would like to edit a specific section of the site, simply find the appropriate label in the CSS file, and then scroll down until you find the appropriate style that needs to be edited.
The file is separated into the following sections:
 0. CSS RESET
 1. MISC
 2. TYPOGRAPHY
 3. LAYOUT
 4. NAVIGATION
 5. FOOTER
 6. WIDGETS
 7. IMAGES
 8. BUTTONS
 9. PAGINATION
 10. COMMENTS
 11. FORMS
dynamic-css.php (located in: /css)
Contains: Styles as set in Theme Options Panel
layout-responsive.css (located in: /css)
Contains: responsive layout styles
prettyPhoto.css (located in: /css)
Contains: Styles for the prettyPhoto Lightbox
font-awesome.min.css (located in: /fonts/fontawesome)
Contains: Styles for icon font
Java Script
"RED:FOLIO" loads the following Javascript files:
jquery.easing.js (located in: /js)
Advanced easing options
jquery.fittext.js (located in: /js)
Flexible font size (for big headings) for responsive layouts
jquery.fitvids.js (located in: /js)
Used for fluid width video embeds
jquery.isotope.js (located in: /js)
Masonry portfolio and blog layout and sortable portfolio items
jquery.neatshow.js (located in: /js)
Fade in images beautifully.
jquery.parallax.js and jquery.stellar.js (located in: /js)
Background images with parallax effect
prettyPhoto.js (located in: /js)
Used to display images and multi-media in a "lightbox" that floats overtop of the current web page
jquery.selectbox.js (located in: /js)
Dropdown menu style
superfish.js (located in: /js)
Jquery improved dropdown menu
jquery.waypoints.js (located in: /js)
Execute a function whenever you scroll to an element (used for menu highlight on One Page)
jquery.waypoints-sticky.js (located in: /js)
Sticky navigation header.
scripts.js (located in: /js)
custom jQuery
Credits
I've used the following scripts, files, images, icons in this theme:
FAQ & Troubleshooting
How to update a theme
- Start by logging into Themeforest with the account that you've used to purchase your theme.
- Click Downloads and re-download the theme you've purchased. You will automatically get the newest version.
- Go to your WordPress admin and click Appearance > Themes . Activate any different theme, choose delete files for the old REDFOLIO theme and then upload the new theme and activate it. If you attempt to upload a new version of a theme without deleting the old version first, the theme install will fail.
If you are still uncomfortable deleting the old theme, you may use a plugin, like for example Easy Theme and Plugin Upgrades to automate backing up your current theme and uploading the new version. In case something goes wrong, you can simply change back to the old theme.
IMPORTANT!: As update 3.0 was a major update, if you are updating from version 2.06 and below, please follow the instructions in the changelog.
How to translate a theme
RedFolio can be translated into any language without having to edit the template files.
- Go to Settings > General and set the Site Language to your language.
- Download Poedit, which is a free, open source tool.
- Look for the the redfolio.pot file, which is included in your theme files (in the subfolder "languages") and open it with Poedit.
- Click "Create New Translation", select your language and click OK
- You should see a list of all strings (in English) used in the theme. Go through the list and click on the text that you want to translate. When you click a line of text, the same text will appear at the upper of the 2 boxes at the bottom. Enter the translation for the text in the lower box.
- If you right-click on any line, you’ll see a file name and line number like “archive.php line 71″. That is the place in the theme files where this text is being used.
- If you are looking for a certain text that you want to translate, click Edit > Find .
- In Poedit > Preferences > Editing, make sure Automatically compile MO file when saving is checked. That way, when you click File > Save as, it will automatically output a .po and .mo file. The naming of your .po and .mo files is important. The naming convention is based on the language code (e.g. pt for Portuguese) followed by the country code (e.g. _PT for Portugal or _BR for Brazil). So, the Brazilian Portuguese files would be called pt_BR.po and pt_BR.mo. A complete list of codes can be found at language codes and country codes. Save the translation files in the same folder as the redfolio.pot file.
You can always open your .po file again (in Poedit) and add translations.
Theme Installation Error “The package could not be installed. The theme is missing the style.css stylesheet.”
Make sure you are not uploading the whole zip file that you've downloaded from Themeforest (including demo content, license, psd files, readme ...) but only the redfolio.zip file.